Wednesday, February 11, 2015

Dollar Tree Wreath

I absolutely LOVE Valentine's Day colors...They were actually my wedding colors.

One of the crafts that I want to do sometimes during my crafting cycles are home decor. I had bought a 9" wreath that was naked, along with a few bunches of red and white roses, and some heart picks from the Dollar Tree.

I had finished my mini album for Valentine's Day and still wanted to craft something other than a layout or cards---although I have got some birthdays coming up this month---one is actually this week! YIKES!!!

So, I put together a wreath for Valentine's Decor.

It was super easy-you just need a wire cutter for trimming the little branches off of the bunches.

You basically cut, arrange, and weave or stick the picks/branches into the wreath.

How easy is that? It maybe took a half hour.

Not every craft or project needs to cost a fortune to make or take hours of your time. This wreath took under $10 to make!

I hope this inspires you to make something fun!! 

Thanks for stopping! 

Tuesday, February 10, 2015

Valentine's Chipboard Mini Album

Four more days until Valentine's Day! It's just all but snuck up on me this year. I'm happy that I did have enough time to create something----although at first, I was not sure it was going to be a Valentine's Day gift. But as I worked on it, I knew it had to be.

We (my hubby and I) are very happy and lucky to be together this year. Last year, we were not as happy and pretty much on our way to a divorce. Thank God for second chances, forgiveness, and what I believe now is True Love. Hmm...sounds corny, but we got through some pretty bad decisions last year and it would have broken a lesser than True Love.

I am going to go right into what I used for this album and then share it after.

I used Pink Paislee's "Sweetness" Collection for most of the mini-album. The items I used from the collection are:
- "Sweetness" Chipboard Album
- "Sweetness" Glitter Sticker Elements (They are the blue ones.)
- "Sweetness" Cardstock Stickers
- "Sweetness" Doodads (They are the felt stickers.)

The paper I used for covering the inner chipboard pages are from the My Mind's Eye by Jen Wilson's "Totally Girl" 180 sheet paper pad.

I also used my bling "stash" for all of the bling and pearl "bling" on the pages.  I used ribbon from my ribbon "stash" for tying to the binder ring. The binder ring was one that you can buy from the office section of Walmart.

The couple of pink notes that you see with "Us" and "Love" on them are from my Heidi Swapp stash. Yes---I have a Heidi Swapp stash---Don't judge!!

On the front cover, for a little extra glitzy-ness, I used "Smooch" metallic accent paints in Snicker doodle and Sassy Pink.

Basically for the album, I found pictures on Facebook and downloaded them to my computer. Then I sized them in Photoshop and printed them. I didn't have enough pictures for the whole album, so I came up with the idea of using some of the songs that remind us of, well---US---on the pages that didn't have pictures. I took parts of the songs and wrote them on the pages and embellished them.

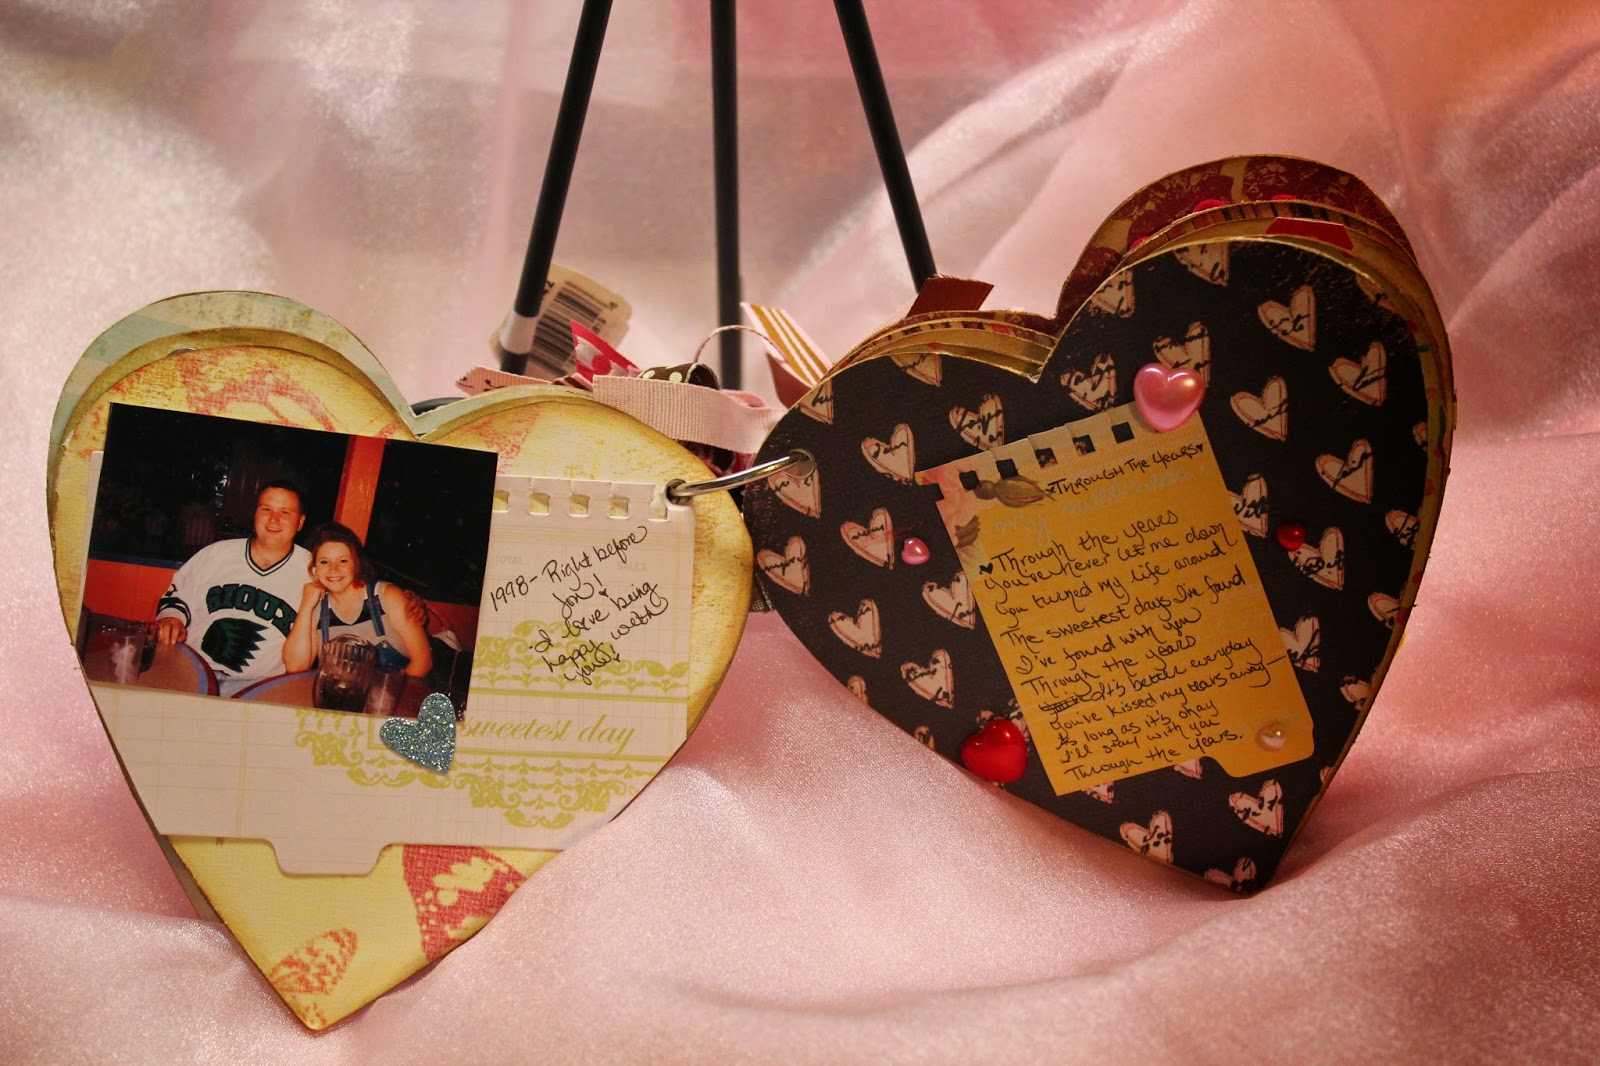
I will lightly explain each page's pictures (i.e. when taken) or lyrics/song-although I'll let the lyrics speak for themselves....if you are able to read my writing.

Front Cover

Picture from Gibson Park- April 2014

Picture from 2014-Before a Date Night
Some lyrics from P!nk's "True Love"

Lyrics from Kenny Chesney's "You Save Me"
Picture is from 20+years ago

Picture from 1998-right before we got pregnant with Jon
Lyrics from Kenny Roger's "Through the Years"

Lyrics from Depeche Mode's "Just Can't Get Enough"
Picture from September 2010

Picture from Summer 2014
Lyrics from P!nk's "Just Give Me A Reason"

Lyrics from One Direction's "No Control"
Picture from 2010 
Pictures from September 2010 and Winter 2014

Picture from Spring 2014

I hope you have a beautiful Valentine's Day! 

Thanks for stopping by! :)

Wednesday, February 4, 2015

"Ice Cream" Sammies

Hey Everybody!

Mentally, I've had a rough couple of days.  Creatively, my heart and mind have been pretty low. Before my "low" hit me, I was working on a mini album for Valentine's Day.

BUT-I have been craving my "Ice Cream" sammies.  Notice the words ice and cream are in quotes? You'll find out why shortly.

These treats are definitely not the healthiest, but they are so good!

I was originally going to vlog this.  If you don't know, a vlog is a video blog. However, with my "lows" right now, it's probably best to stay off camera.

I still wanted to bring this delicious recipe to you.

So, here we go!

What you'll need:

2-cups of heavy cream
4-tablespoon of powdered sugar (Now, I sprinkle a bit more while it is whipping, but you don't need to.)
1-teaspoon or more of vanilla.  This truly depends on you and how much of a vanilla-y taste you like.
1 to 2-boxes of soft sugar cookies.

You'll need a Kitchen Aid with the whisk attachment.  If you don't have a Kitchen Aid, this recipe can also be made with a hand mixer.

You will also need wax paper for wrapping the sammies for the freezer and a 2-gallon Ziploc bag or 2-one gallon Ziplocs.

First, you put the heavy cream, powdered  sugar, and vanilla in the Kitchen Aid/bowl.  Then you start mixing.  Make sure you start at the lowest speed so the ingredients don't go flying.  Once the mixture foams a little bit, go ahead and turn the speed up to a medium high speed.  During this time, you may want to add a little more powdered sugar.

Once the speed is up, you can continue mixing until the mixture is stiff.
Take two of the sugar cookies and lay one upside down.
With a spoon--I used a plastic one, but you can use any type: a wooden spoon, a table spoon, ice cream scoop-whatever you want, and start spooning/scooping the whipped cream on to the cookie. With this, you can judge how much cream you want on there.
After you've scooped as much whipped cream as you'd like o the bottom cookie, take another cookie and place it right side up on top of the cream. Viola-you have your first "ice cream" sammie!
Wrap the sammie with the wax paper.
Repeat the process for the rest of the cookies.  This recipe makes 12 sammies.
Once done, place all of your wrapped sammies into a 2 gallon Ziploc or split them into 2-one gallon bags.

Freeze for 2 to 3 hours and then ENJOY!
Well, there you have it! I hope this recipe inspires you to get into your kitchen.

Thanks for stopping by! :)

Sunday, February 1, 2015

HELLO KITTY!!!

I'm not sure if I can fully express the love I have for Hello Kitty!

I actually completed these cards with my other cards from the previous blog post on Valentine's/Love Cards.  BUT I feel that Hello Kitty deserves her own post.

I have two Hello Kitty Cricut Cartridges.  I have Hello Kitty Font and Hello Kitty Greetings.

On this first card, I used the Hello Kitty Font Cartridge.

The base of this card is Bazzil's Special Occasion paper.  It's got a pearl-like finish.I used an EK Success paper punch on the side.

The rectangular mat is from Papertrey Inc. I rounded the corners with a Becky Higgins corner rounder.

The black base on the Cricut image is Bazzil Bling paper.  I am not sure of the brands of the light and dark pink papers used,  Hello Kitty, herself, is cut with American Crafts cardstock in snow.

The ribbon is Offray.  The black bling is from my bling stash.

This next card was inspired by my best friend's daughter.  Her daughter was a cheerleader for four years at our high school here in town.

The base is basic white cardstock.  The patterned paper is from Basic Grey's "Recess" Collection.

The image is from the Hello Kitty Greetings Cricut Cartridge.  The stars were cut from the George and Basic Shapes Cricut Cartridge with gold, metallic paper.

The "GO GIRL" stamp is from Studio G.

Last, but certainly not least, is an "I Love You!" card.

The base is basic white cardstock.  The patterned paper is from Papertrey Inc. and corner rounded with Becky Higgins' corner rounder.

Both images were cut using the Hello Kitty Greetings Cricut Cartridge, using Bazzil papers.

AND.....there you have it! Three Hello Kitty cards.  They were fun to make!

I hope you liked them and are inspired by them.

Thanks for stopping by! :)